Amazon asked our team to build an MVP for a Mixed Reality conference room. The idea: each participant stays in their own physical space, whether at home or in an office, while seeing remote colleagues as holograms sitting around a shared virtual table. If the internal test went well, Amazon planned to take it to a full product.
01 — Hardware & Setup
Finding the right device
I tested several MR headsets with the team: the Oculus Quest 2, HoloLens 2, and NReal. The HoloLens 2 was the clear choice. It was the only device that could overlay virtual content onto a real room convincingly enough for a conference setting.
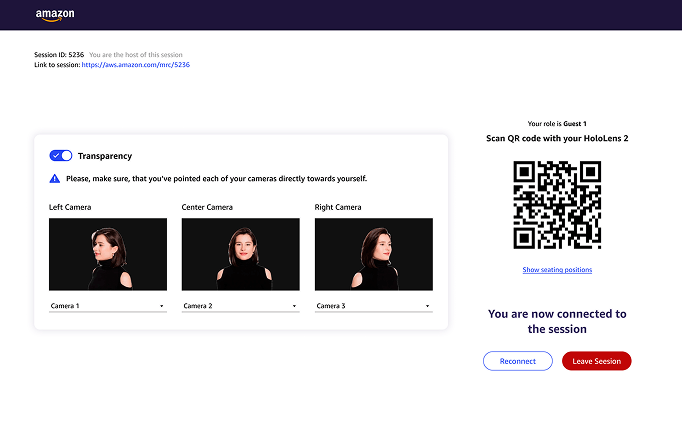
To capture each participant's image for the stream, I settled on three webcams per user. Three cameras give remote participants a correct view of the speaker regardless of where they're sitting at the virtual table. The software strips the background from each feed automatically.
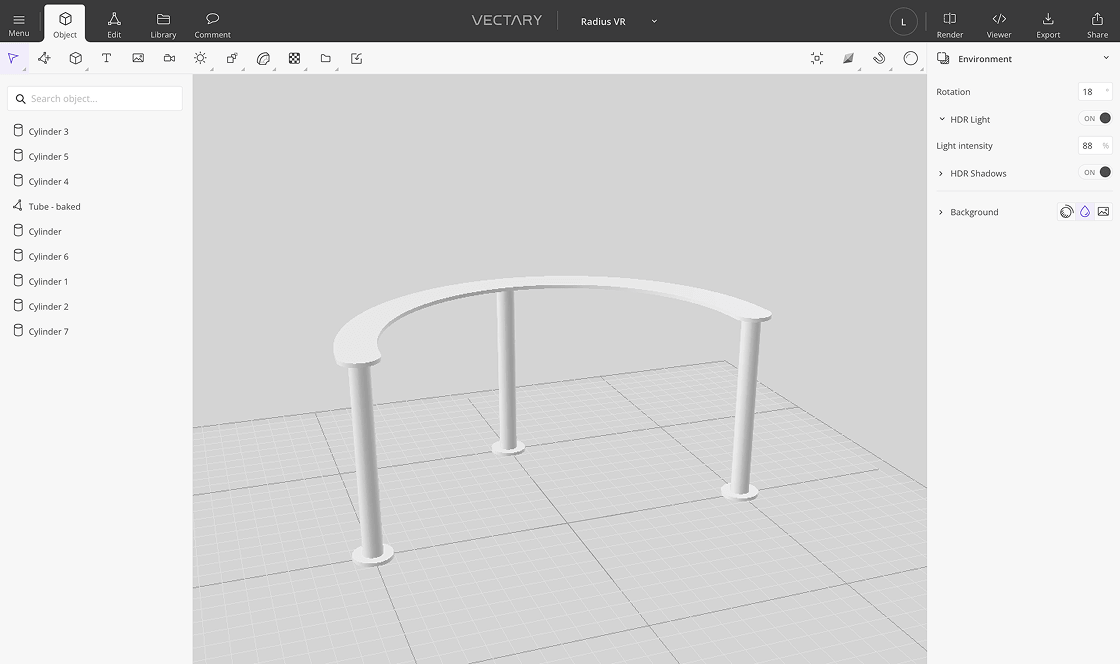
The cameras needed a precise mount. I designed a custom plastic stand, modeled it in 3D, and the team printed a prototype. The first version worked.


02 — Strategy
Scoping the MVP
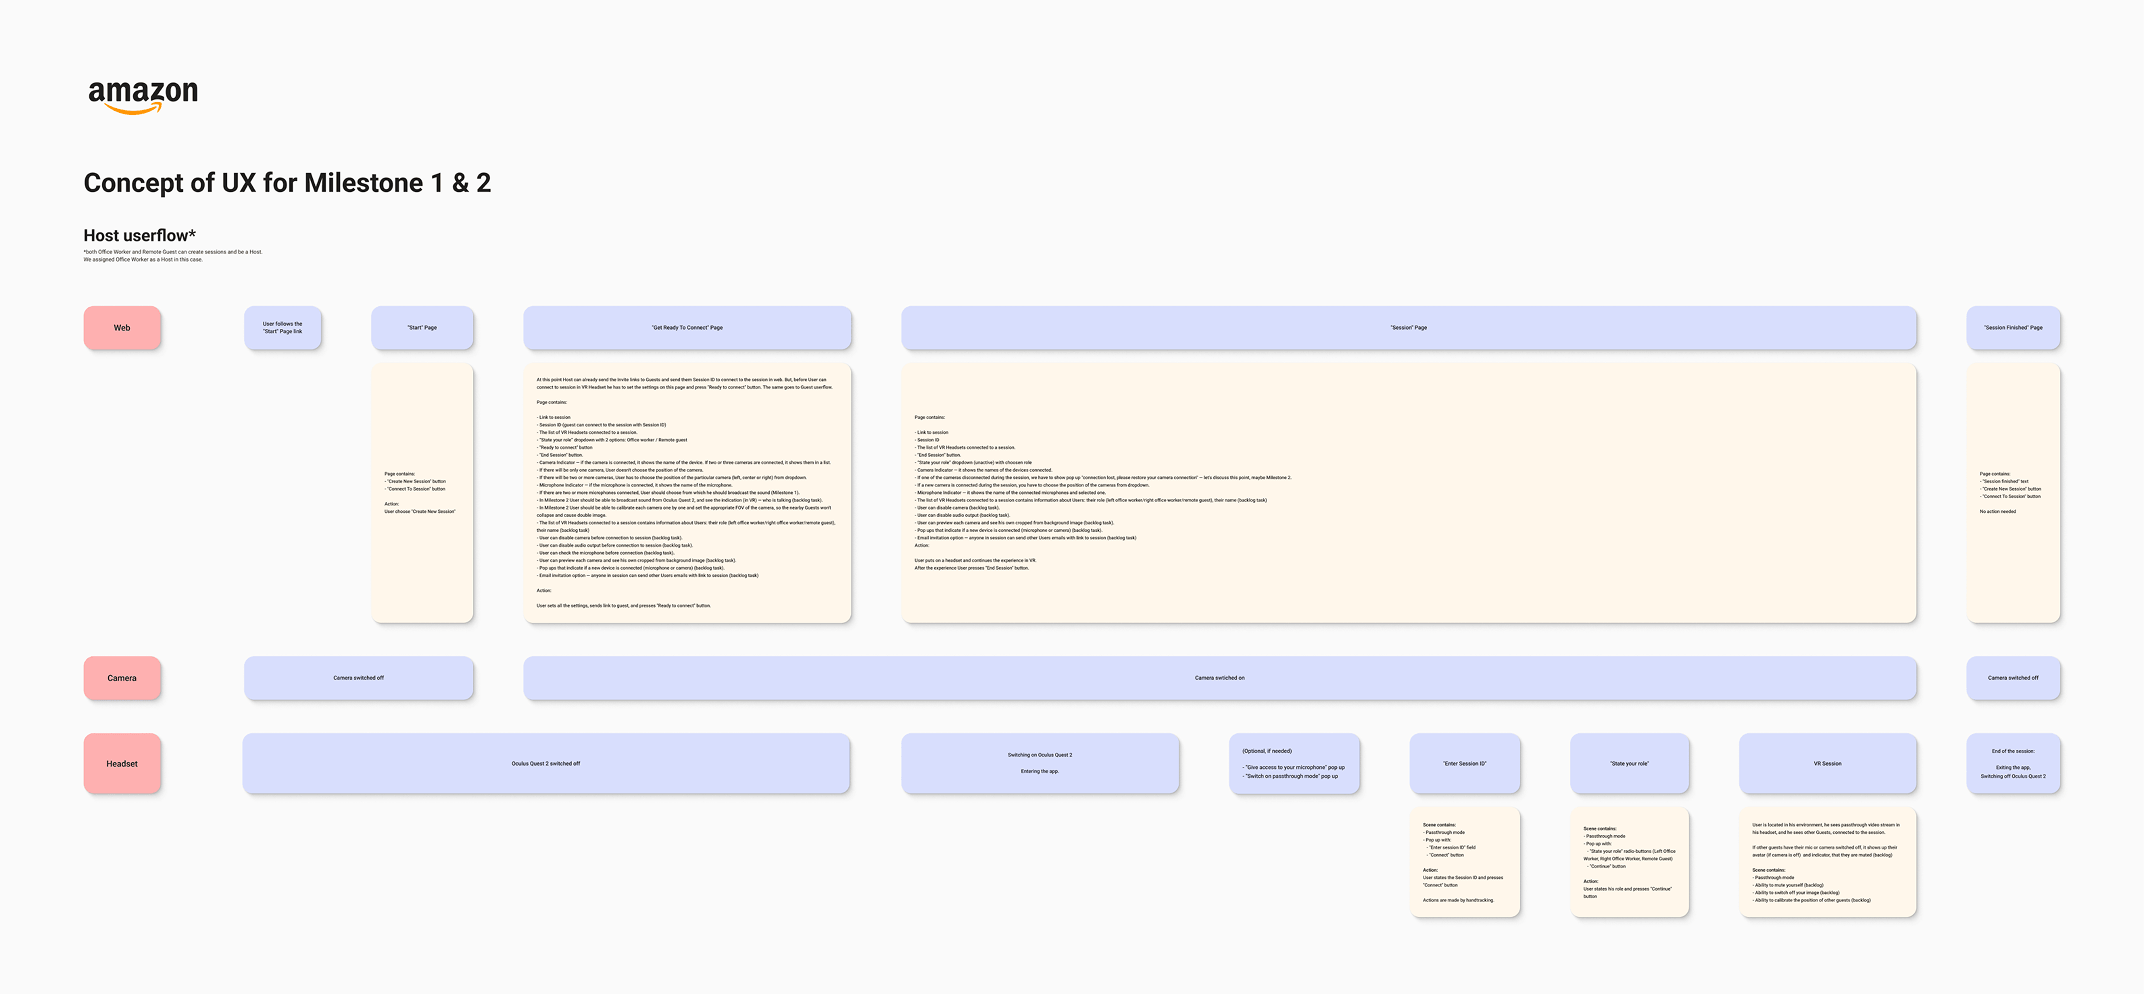
The product had two parts: a web app for hosts to set up and manage sessions, and a HoloLens 2 experience for participants. The web app was a practical shortcut for the MVP stage. In a full release, session creation would move entirely into the headset.
I wrote user stories for both roles, host and participant, then sketched the core flows. After a few rounds with Amazon's team, we landed on the right approach for the first build: keep it minimal, get it testable fast.
03 — Information Architecture
Mapping both flows
With the user stories done, I mapped the full flow for both products. The key constraint: the two sides had to stay in sync. A seat chosen in the web app had to match the seat in the headset, otherwise the webcam angles would display incorrectly for other participants. Getting this logic right before wireframing saved a lot of back-and-forth later.
04 — UI Design
Design kit and screens
Before touching individual screens I built a design kit that was updated throughout the project as new components were needed.
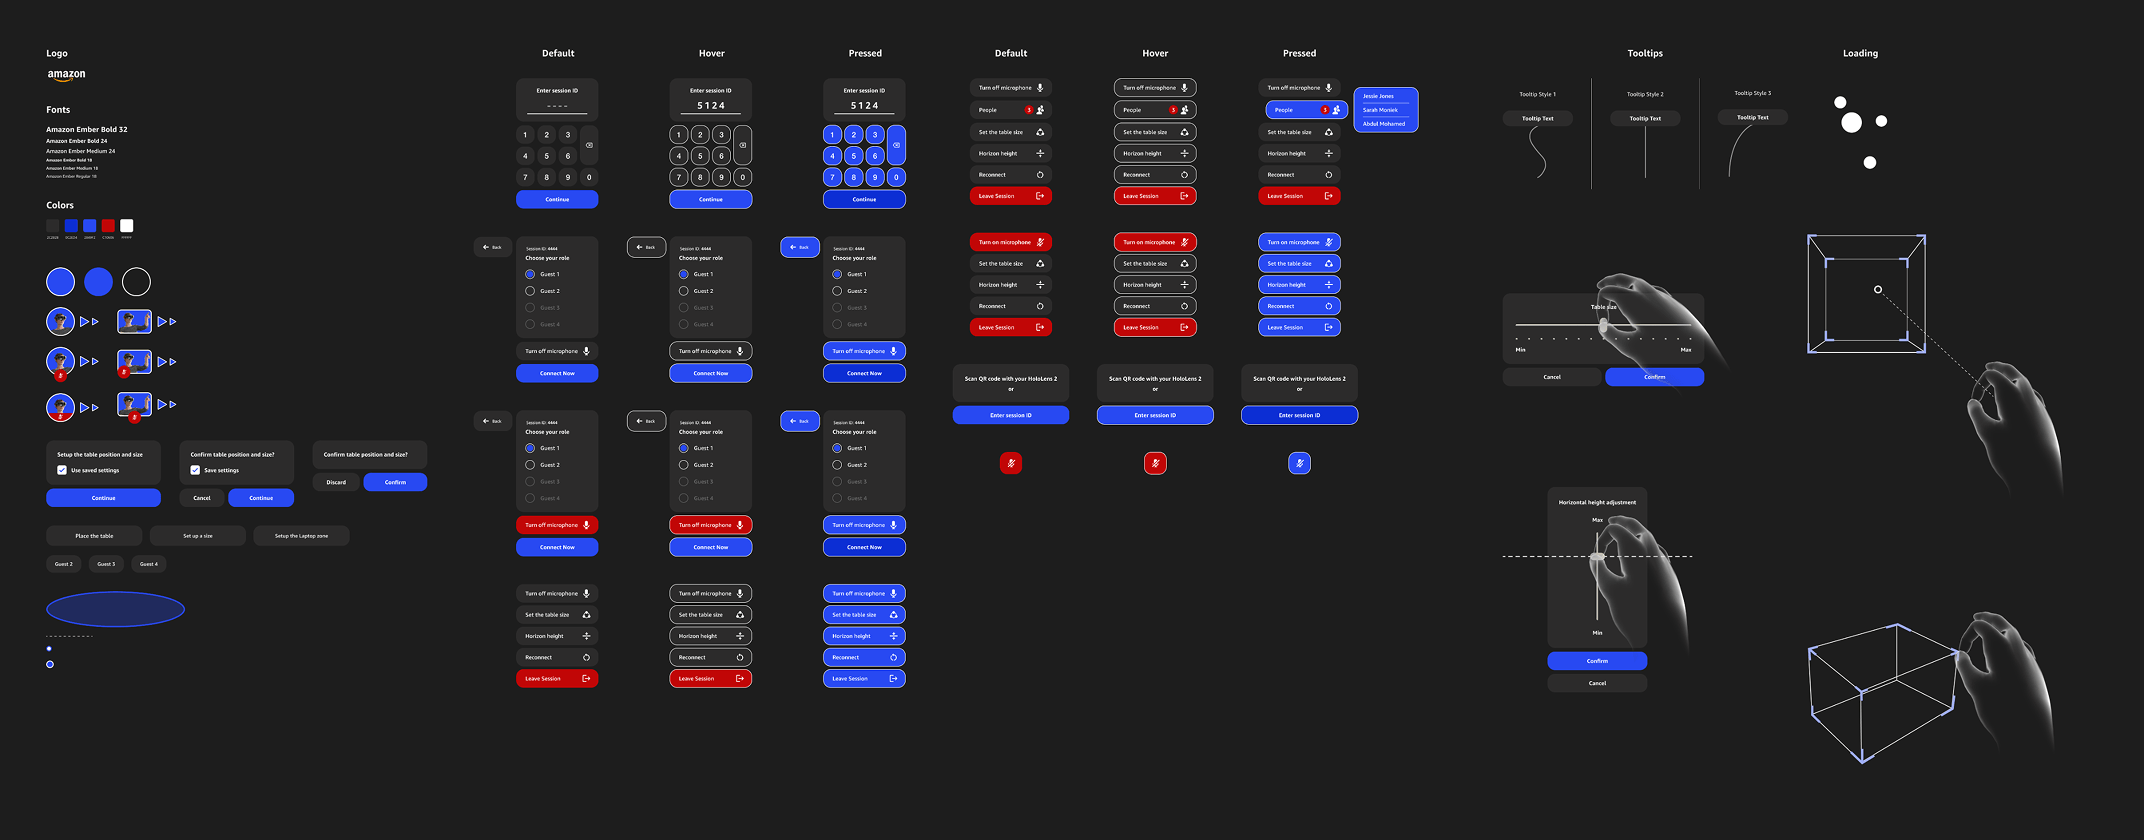
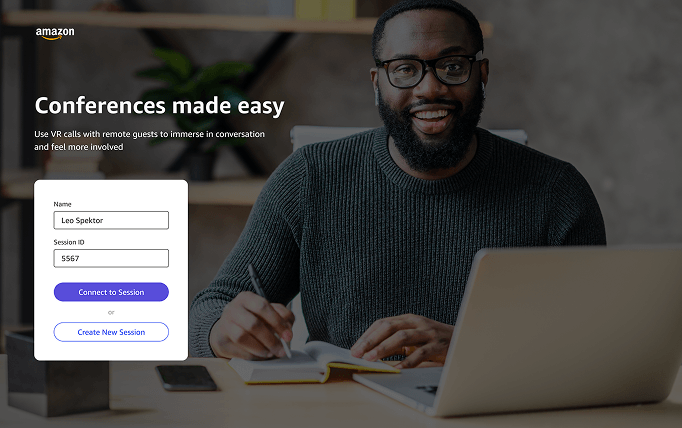
Web app
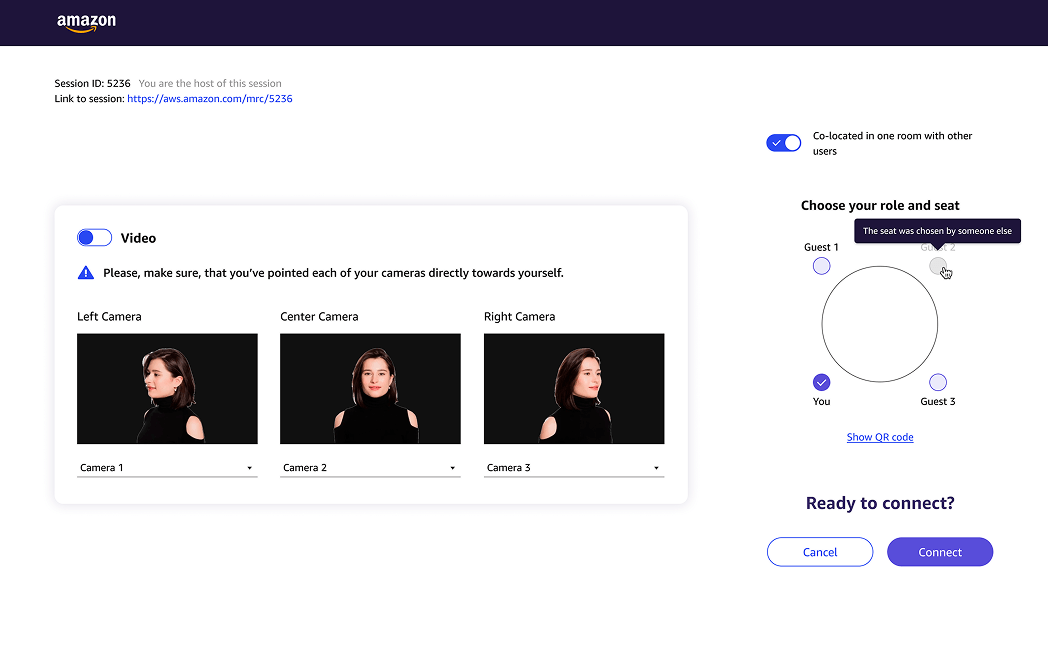
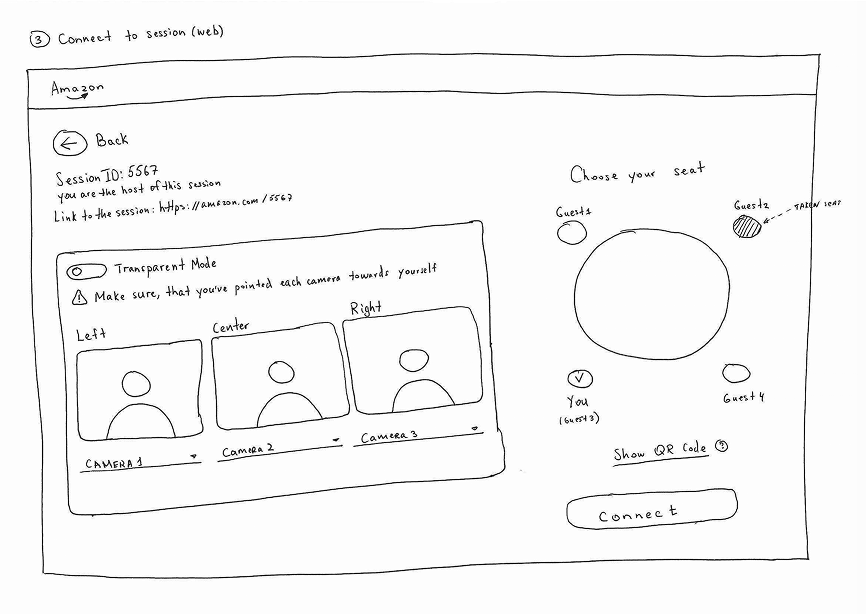
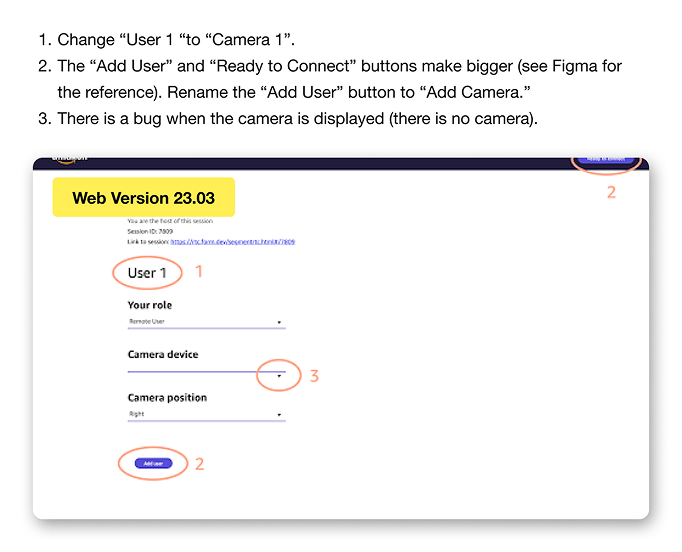
The web flow gives the host two entry points: create a new room or join an existing one. Once in the room, they enable three webcams, and the software removes the background from each stream. The final step is selecting a seat and connecting to the session.
05 — MR Experience
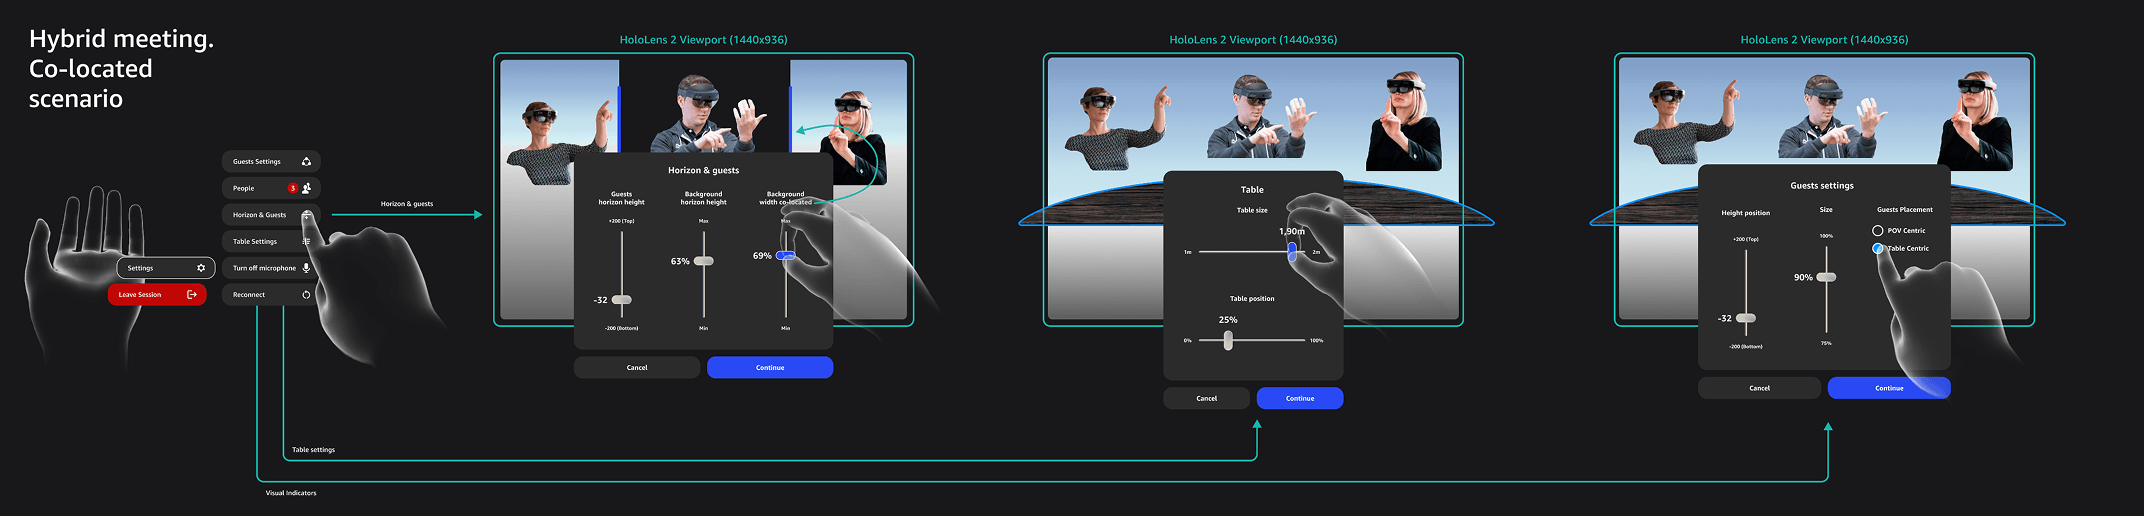
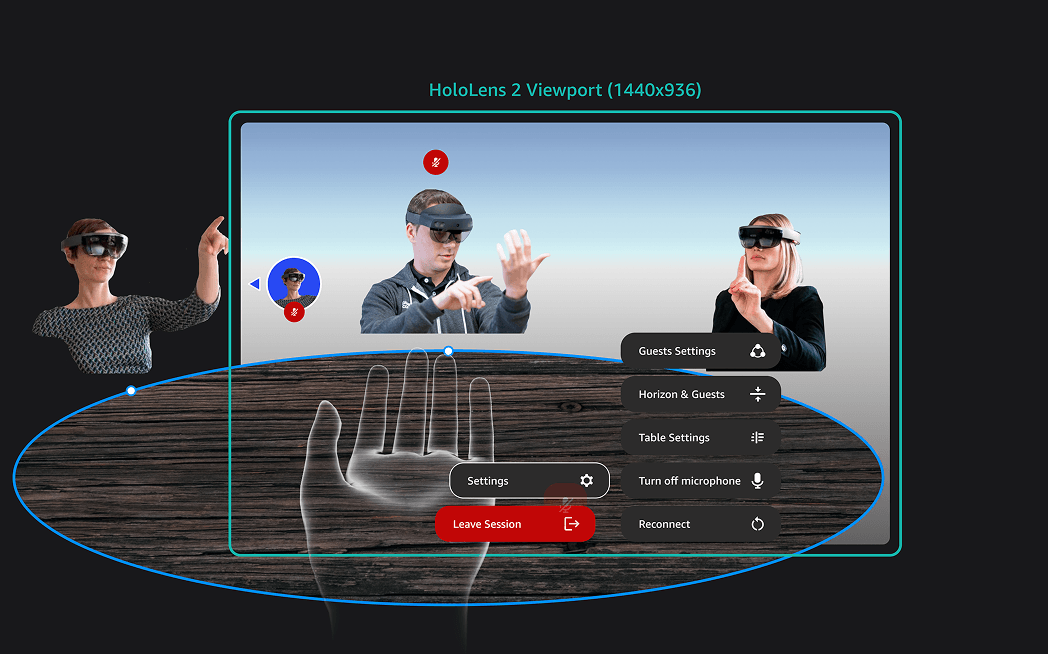
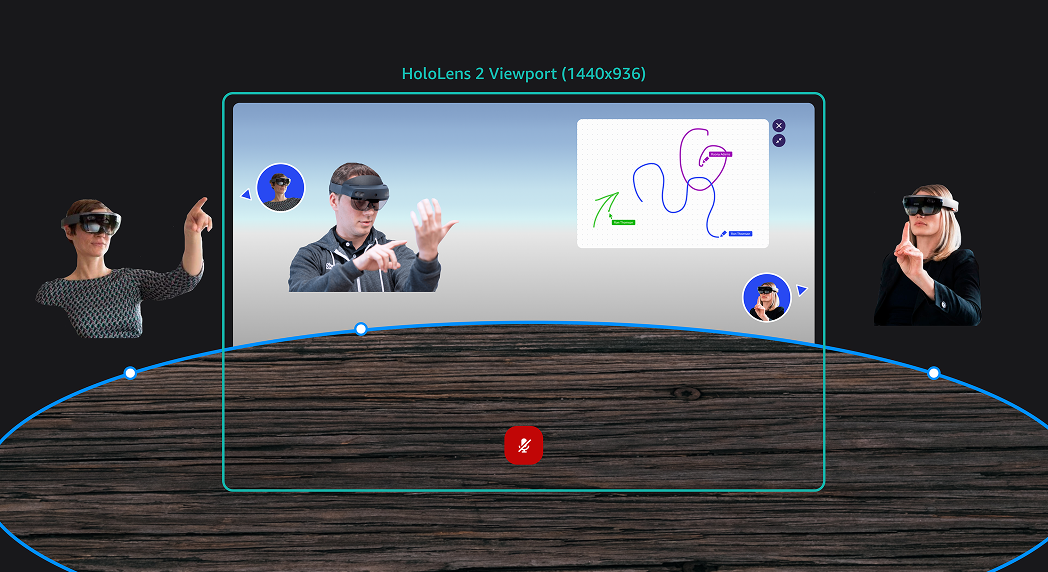
The HoloLens flow
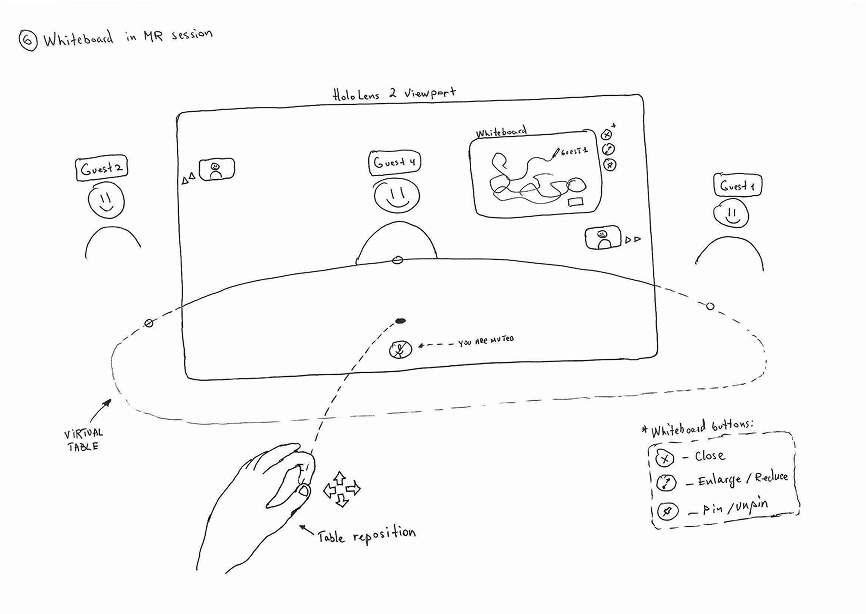
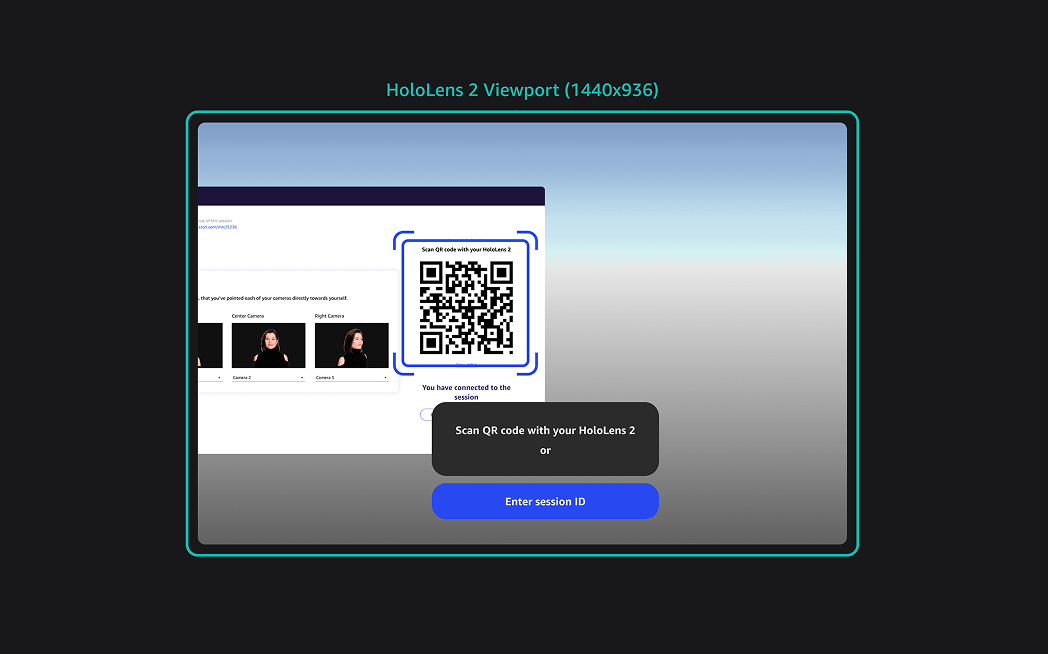
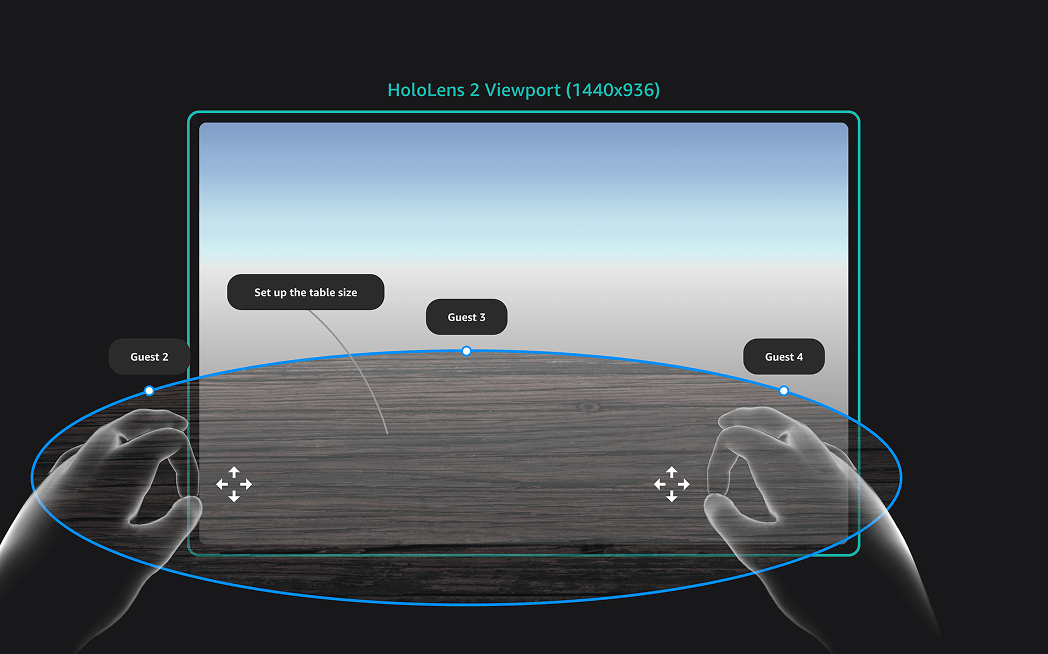
In the headset, the participant enters a room number or scans a QR code from the web app to join instantly. They then pick their seat at the virtual table. The seat selection has to match the one chosen on the web app so the camera feeds display from the right perspective for each person in the room.
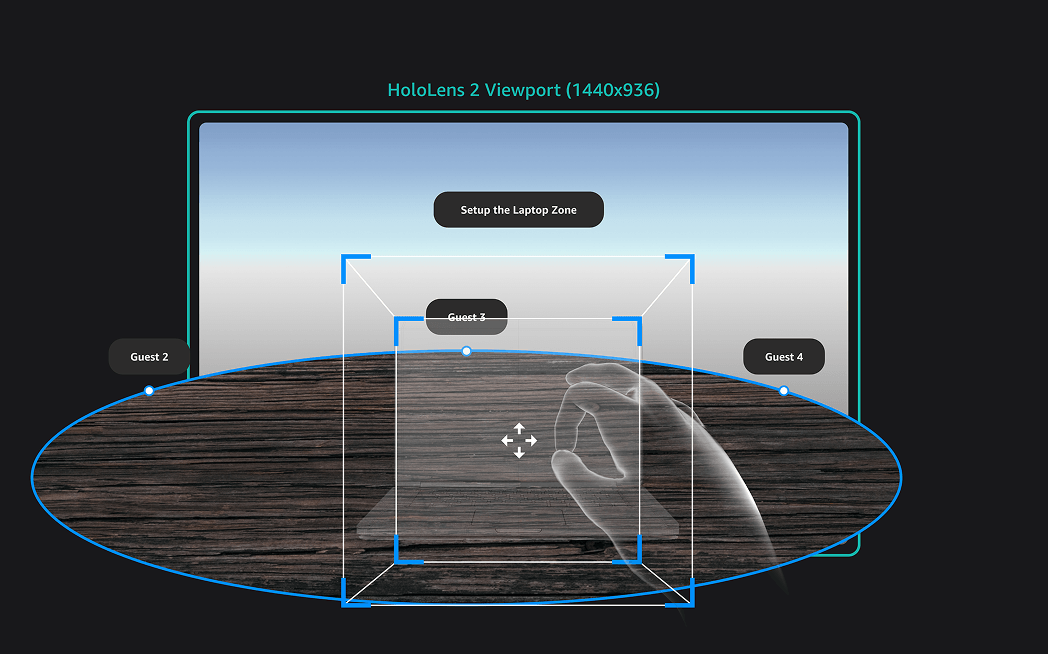
Inside the session, participants can adjust the virtual table's height and size, reposition other attendees in the space, and mark where their laptop sits to stop holograms from overlapping with their screen.
06 — Collaboration
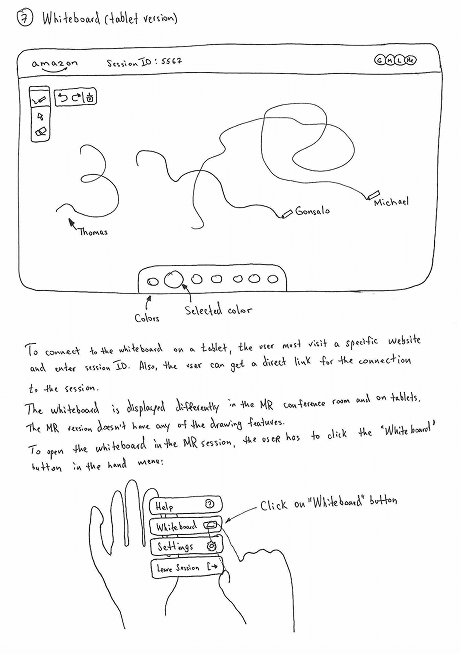
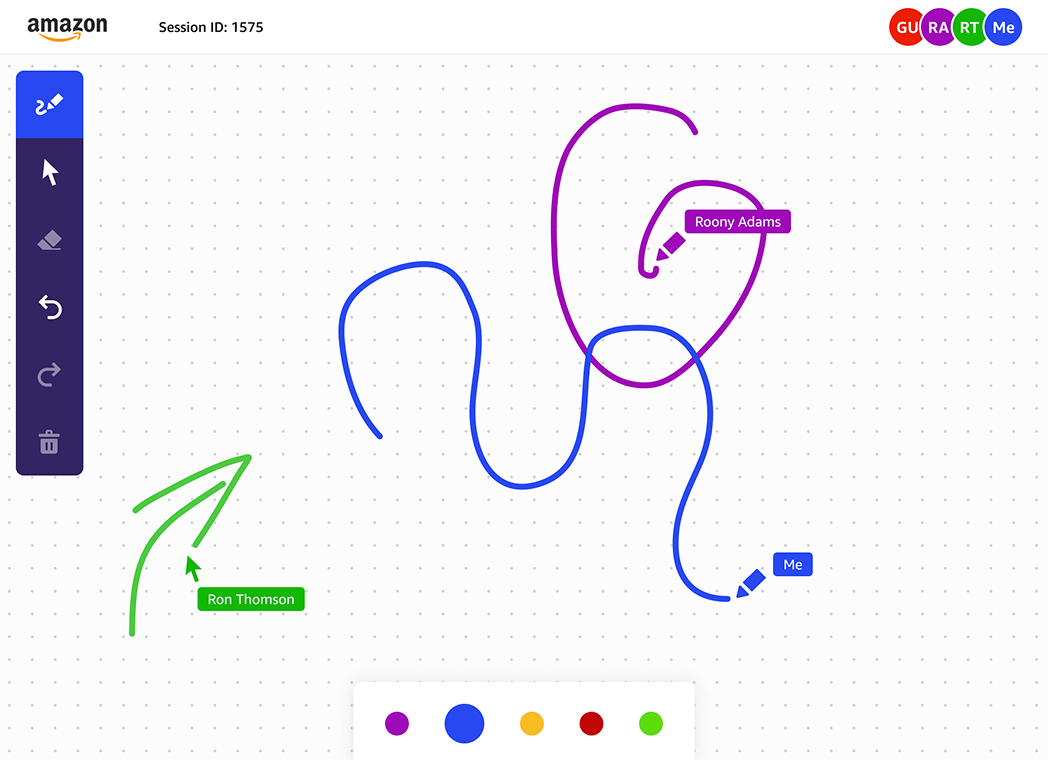
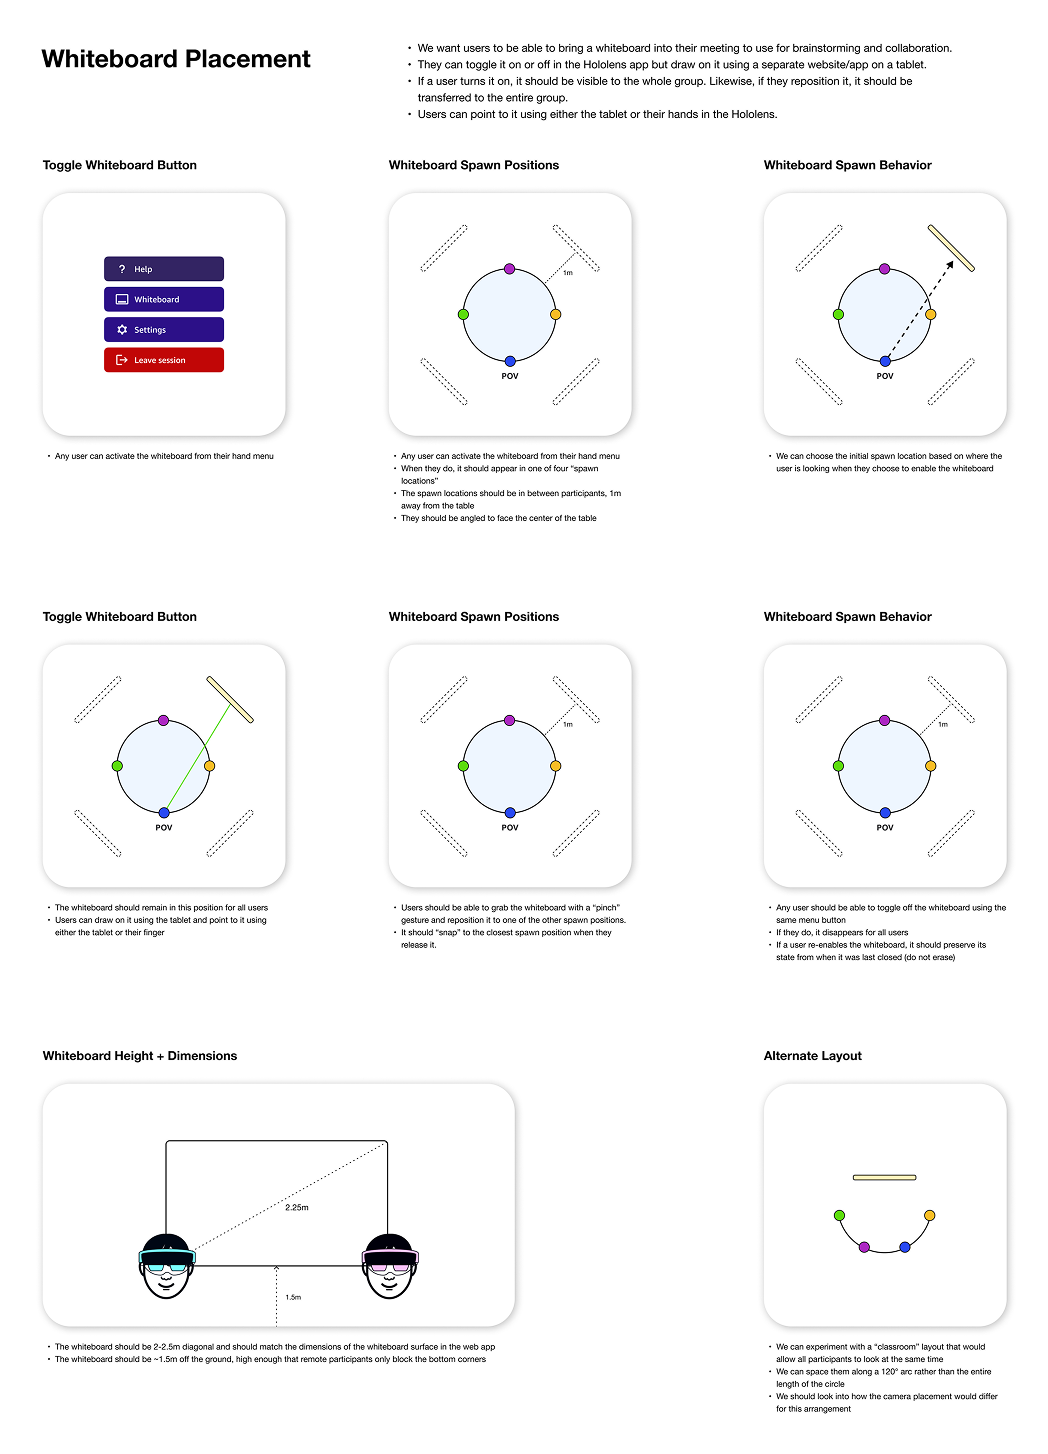
Virtual whiteboard
The whiteboard lets participants draw on a tablet and see their strokes appear in real time on a shared surface in the MR room. Everyone in the session sees the same whiteboard, both in the headset and on their own tablet. It was one of the features that made the experience feel genuinely collaborative rather than just a better video call.
07 — Interaction Design
Gesture system
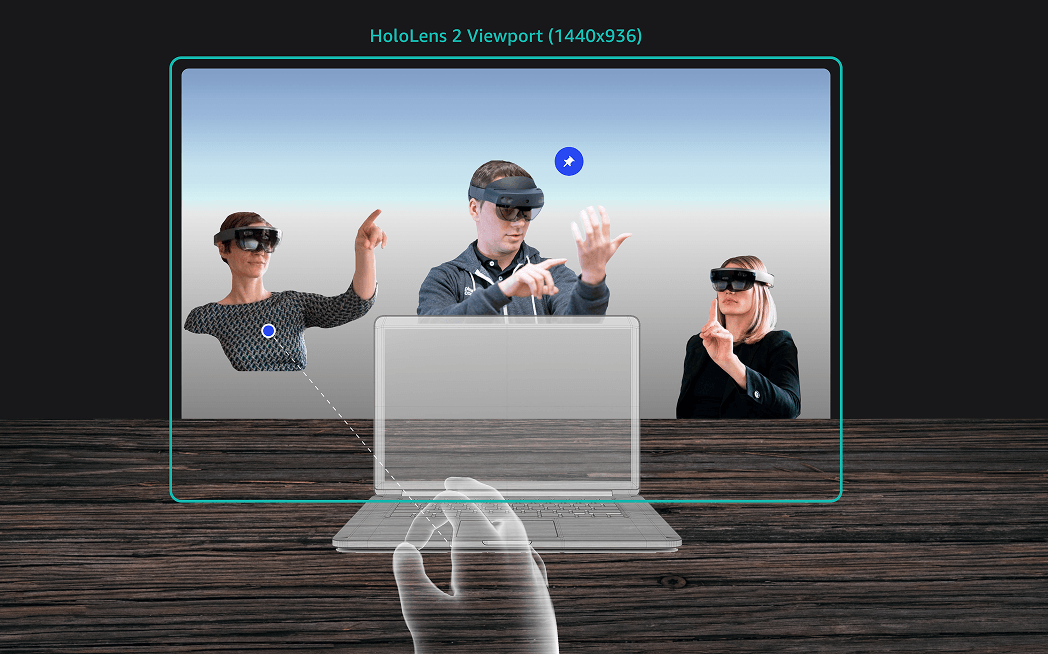
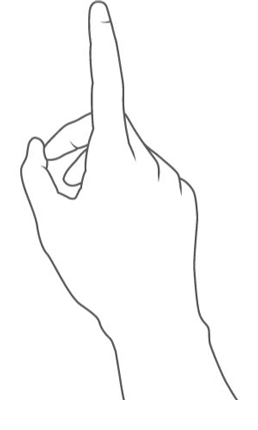
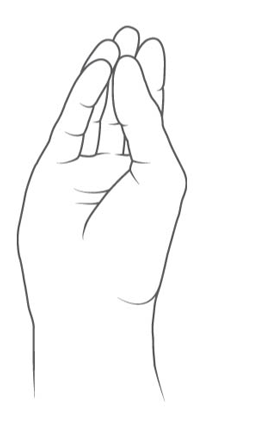
Without a physical controller, every interaction in the headset depends on hand gestures being natural and learnable fast. I reviewed the standard HoloLens 2 gesture library and selected three: pinch and grab for moving elements, finger poke for pressing buttons, and open palm for the hand menu.
08 — Testing
Hands-on feedback
I was involved in testing throughout development, running sessions with team members and logging issues. Being present during tests helped catch gesture recognition problems and spatial UI issues that weren't obvious from the design files alone.
09 — Results
Outcome
Amazon's team validated the concept. The MVP proved that a functional mixed reality conference experience was achievable with current hardware, and the core interactions tested well with internal users. The product was handed off with a recommendation to move into full development.
10 — Reflection
What I'd do differently
- Start with research before the build. I jumped into implementation quickly and it showed. User interviews and structured ideation upfront would have caught several assumptions we had to correct mid-project.
- In an MVP, speed beats polish. The goal is a working prototype you can learn from, not a finished product. Moving fast and testing each feature before the next is the right approach for first builds.
- Design for the hardware constraints early. Gesture recognition and spatial layout behave very differently from screen-based UI. The earlier you prototype in the headset, the fewer surprises during testing.